Your Cart
Your shopping cart is empty!
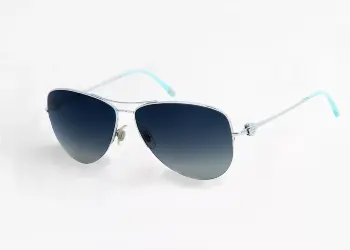
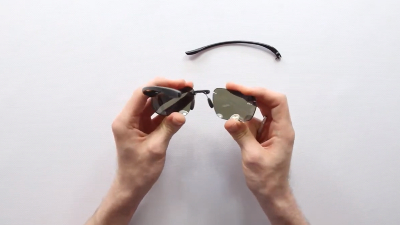
1. Frames with a nylon cord or fishing line holding the lenses in place.
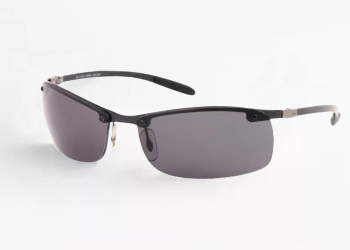
2. Frames that are semi-rimless and have the lenses mounted by screws.
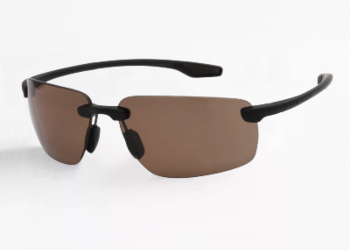
3. Frames that don't have a rim around the lens and screws to mount the lens.
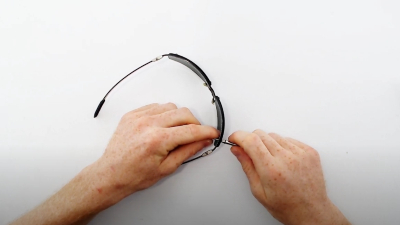
First you will need to have some thin nylon cord or fishing line to thread between the lens and your sunglass frames.
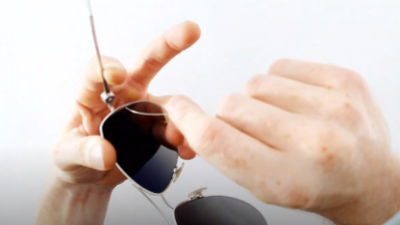
There should be a small gap where the frames changes from metal or plastic to the thin nylon cord, Threat your fishing line through this gap. Once you have your cord wrapped around the nylon on the sunglass frames you will need to pull the hand held cord from one side of the lens to the other, derailing the nylon cord on your sunglass frames as you go.
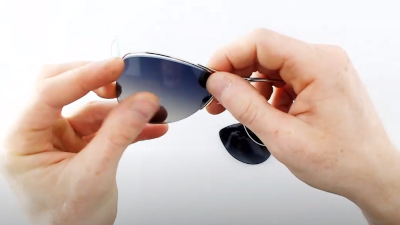
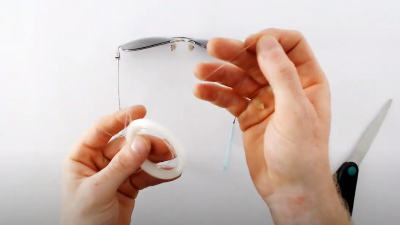
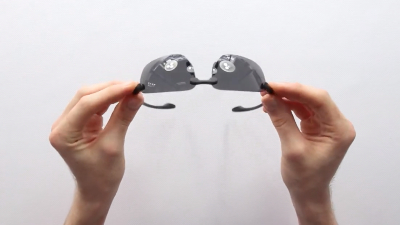
To install your new lenses, begin by carefuly inserting the new lenses into the top section of your sunglass frames, wrap your nylon cord around the nylon on your sunglass frames and proceed to pull the sunglasses nylon back into the groove from one side to the other, similarly to how you removed the original lenses.
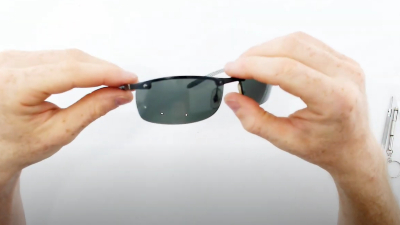
Once you have installed the lens, gently rotate the new lenses clockwise and anti-clockwise in the frmaes to ensure that the nylon cable is sitting in the groove the entire way around the lens. Then carefuly polish your lenses. Enjoy seeing clearly through your new sunglass lenses!
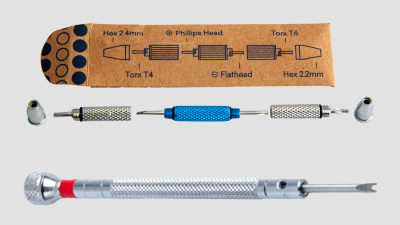
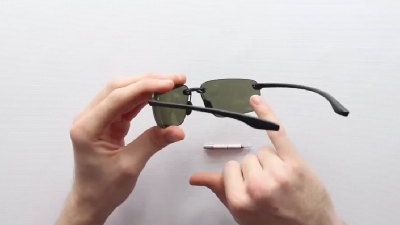
You will need two specific tools to remove the lenses for these models. One being a 2.4mm hexagonal spanner, and the other is a U-Forked screw driver. We have both of these tools available on our website, however alternatively an optomitrist could do the installation for you.
With the U-Forked screw driver on the inside of your sunglass frames, and the hexagonal spanner on our outside, you will need to unscrew the screw from the front without letting the nut on the back rotate in place. Preform the uninstallation of the screw on both the nose and tail sides of the lenses.

Once you have removed the original lenses, hold the new replacmeent lenses in place over the top of the mounting holes. Its easiest to install the nose side screw first as this has a housing its screwed into. seccondly install the tail side screw in the same way you uninstalled it by holding the nut on the inside of the frames with the U-Fork screw driver.
After installation you should ensure that all the screws are done up firm but not too tight. Polish the installed lenses and enjoy seeing clearly again.
Use a phillips or flat head screw driver to partially remove the screws so that the screws stay in the sunglass frames but the lenses are able to be removed, completely removing the screws can result in lost parts.
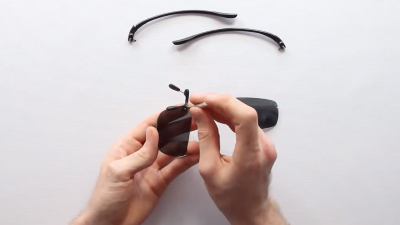
Continue step 1 and completely remove both lenses from the frames. At this point the frames should be in five seperate parts, nose bridge, left and right arm, and both lenses.
Line up the new lenses with the sunglass segments, make sure you have some pressure pushing the frame segment towards the lens to ensure that the hole will line up correctly, and screw the screw in. If the screw feels as though it hasnt found the hole, it can be helpful to remove the lens and look for a mark that the screw left on the lens to help you to align the hole.
go back over the screws are ensure they are firmly tightened but be careful not to over tighten as you could strip the plastic the screw is meant to bite. Polish your lenses and enjoy seeing clearly again!